Viewer

 |
Exam switcher |
 |
Time scroll |
 |
Aux switch |
Keyboard controls
Viewports
| Action | Shortcut |
|---|---|
| Scrolling | Mouse wheel |
| Windowing | CTRL + left click/drag |
| Panning | ALT + left click/drag |
| Zooming | ALT + right click/drag |
| Centering | SHIFT + left click/drag |
| Move ROI | SHIFT + left click/drag |
| Fullscreen | Double click |
Other
| Action | Shortcut |
|---|---|
| Time | left / right keys |
| Switch case | CTRL + left / right keys |
Exam switcher
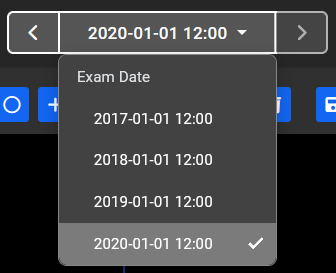
This allows switching between exams of the same patient. The and buttons switch to the previous and next exam, sorted by time. The center button lets you jump to a particular exam.
Time scroll

Select the timepoint to display. While scrolling, a preview of the current viewports will be displayed. When you let go, the full volume will begin to load in. While loading, the tool is disabled.
Aux switch
This dropdown behavior depends on the type of case you're viewing. It can either switch to an alternate volume to display in the main three viewports (eg, a subtraction volume), or it can pick a volume to display in the auxiliary viewport on the bottom left (eg a heatmap).
Toolbar
Extras
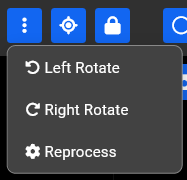
This dropdown menu contains a handful of extra tools. They are ordinarily only accessible to staff.
Rotate
These will rotate a case in the Axial plane in place by 90 degrees. This can be used to fix cases that were reconstructed with the wrong orientation.
Reprocess
Duplicates this case and initiates processing on the new case. This can be used to complete processing on a case that needed to be rotated.
Reset viewers
Reset the viewers back to the center of the volume.
Toggle free MPR rotation
Clicking on this unlocks the crosshairs to enable free rotation of the volume. Click again to disable rotation and return to in-plane views. While this is turned on, several tools are disabled:
- Timepoint slider
- Annotation adding
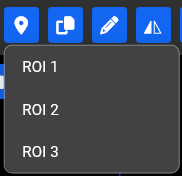
Add elliptical ROI, Add probe annotation
These both toggle annotation tools. When either is turned on, click (and with ellipses, drag) to create new annotations.
Find annotation
This button displays a list of annotations. Click on an annotation to select and scroll a viewport to display it.
Rename annotation
Give the selected annotation a more descriptive name.
Duplicate annotation
Duplicates the selected annotation in-place. Drag the new annotation to move it to a new location.
Flip annotation
Flips the annotation across the sagittal plane.
Delete annotation
Deletes an annotation.
Save session
Saves the current annotations.
Load session
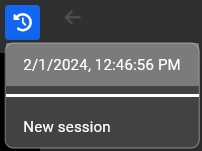
This opens a menu to either switch to a different session, or create a new one. Each session has its own set of annotations on a particular case.
Reset view
Resets the pan and zoom on the viewport
Create Finding
Take a screenshot of the viewport and store as a finding
Findings
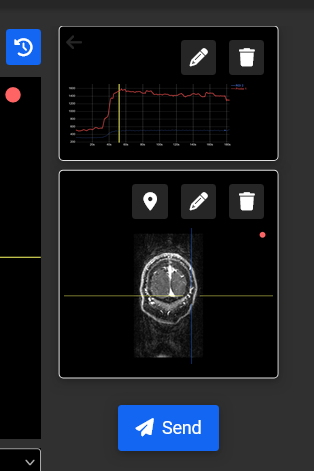
Findings are displayed along the right hand side. Click on a finding to open a full-page viewer.
Locate finding
Moves the relevant viewport to the same slice as the finding.
Edit finding
Add a description to the finding.
Delete finding
Delete the finding permanently.
Send
Send the finding as a DICOM Secondary Capture to the configured destination server
Charts
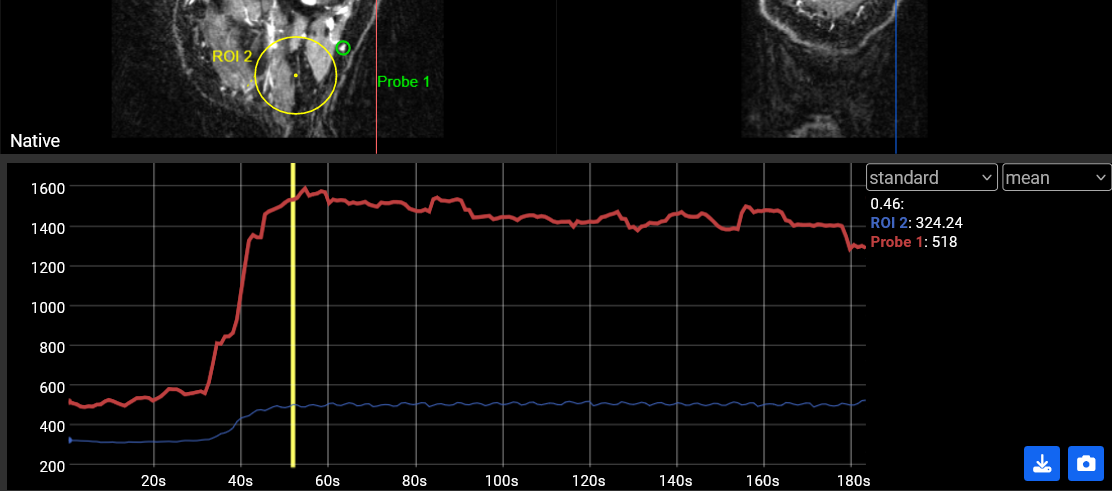 The chart graphs intensity or average intensity over time. The vertical line indicates the current time point displayed in the volume viewports. Using the upper-right dropdown box, you can switch between displaying the median, mean, or ptp (the difference between the brightest and darkest pixel) for ROIs. The other dropdown allows "zeroed" or "normalized" display:
- zeroed: For each annotation, subtract the value at the first timepoint from the rest of the values. This shifts all of the traces up or down to start at 0.
- normalized: Rescale each trace vertically so its lowest value is 0 and highest value is 1.